
Welcome to my Still Life
May, 2016

About This..
This task was given by the Yoobee School of Design (Auckland) where we have to take a photograph with full studio lighting setup of still life objects and recreate a 3D photo realistic image with modelling, sculpting, Texturing, Lighting, Rendering and compositing. I used Photoshop, Maya (renderman), Zbrush, Mari and Nuke for this.. The object I used to make this setup are 3 books, 2 color markers, 3 color pencils, Sony alpha 18-55mm lens, 2 toys (mike wazowski and finn).. It took 4 weeks to recreate this and it was fun and quite challenging..
Here is the step by step process and its breakdown
Here is the step by step process and its breakdown
Step 01
Photoshoot
|
I choose the Three points lighting setup. The Three points lighting is a standard method used in visual media such as video, film, still photography and computer-generated imagery. By using three separate positions, the photographer can illuminate the shot's subject (such as a person) however desired, while also controlling (or eliminating entirely) the shading and shadows produced by direct lighting. The three Lights are, Key light, Fill light, Back light. I used Blue colored as my key and yellow for Back and Fill lights. |
The first step was compositing and setting up the set up.
As a photographer it was not that difficult for me to get a nice result. But setting up the objects was time taking. I tried multiple compositions before landing on one. I coupled a lens, two toys, some pens and books. This all are very close to me and that's the reason I choose this objects. The toys were not mine I borrowed it but I used these toys because I love toys. |
Step 02
Modelling
|
|
The next step was to model all the assets into Maya. Modeling for most of it went smoothly, and I made sure to try and match things up with the original image as I want. It took exact one week to complete all my modelling. Then I sculpt the Mike toy in Zbrush.
|
Step 03
Lighting, Shading, Rendering (LSR)
|
The next step was Lighting, Shading and Rendering. This is my favorite step.
I set the renderman Lights as I mention above, The three point lighting setup with the same intensity and distance as the real lights was. Matching the lights was the easiest step in this whole assessment for me, |
|

|
For texturing I've used Foundari Mari. I love texturing alot. I was trying to match the texture as much as possible. It took a week for the texturing. most of the assets I've used 'Pixar renderman' shader.
And then finally rendering. Rendering in renderman is always time taking. It took some 1.30 hours to render a frame. I've also rendered the passes for all the light set like Diffuse, Indirect diffuse, Specular, Indirect Specular, Glossy, Depth Z, glossy, Indirect glossy and subsurface. |
Step 04
Compositing
|
The final step was Compositing. Before this project, I've never done any composition in nuke in so much detail like this before. Compositing is always just the end process that is done in a couple hours. This project has really shown me the importance of compositing in nuke.
With all the render I've got an awesome result in the end. I was really happy with how it looked in Nuke. The last thing to do was color correction/grading and export it and do a final crop. |
|
Final Composition
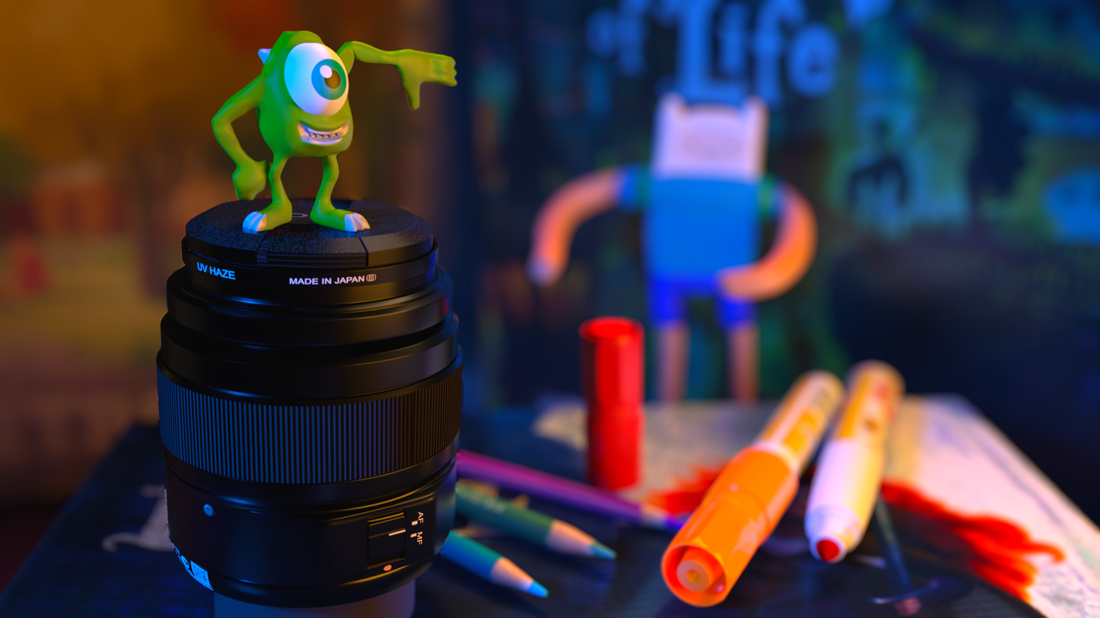
I was really happy and satisfied with the outcome. After doing this I really want to develop my modelling, texturing, Lighting and composition skills further and get into look development.
Final Still Life Video
with Breakdown
Still Life from Aditya Thakur on Vimeo.
